
How to Build a Paver Patio (What Most DIY Guides Don't Tell You)
Building a paver patio yourself is possible, but most DIY guides leave out the mistakes that end up costing homeowners thousands to fix later. If you’re thinking about tackling this project to save money, you need to know what can go wrong before you start digging.
Here’s the truth: those YouTube videos and Pinterest guides make it look simple. They show the fun parts like laying pretty patterns and sweeping sand into the cracks. What they don’t show you is the patio that starts sinking after the first winter, or the pavers that shift and spread apart because the edge restraints weren’t installed right.
Staten Island homes face some unique challenges that generic DIY guides completely ignore. Our clay-heavy soil doesn’t drain like the sandy soil you see in those tutorials. Our winters are brutal on anything installed incorrectly. And if you live in one of Staten Island’s older homes, you’re already dealing with settling foundations that can affect your patio.
This guide isn’t meant to scare you away from a DIY project. It’s meant to show you what professional contractors know from fixing hundreds of failed patios. Think of it as honest education from someone who’s seen what happens when shortcuts are taken.
If you’re still not sure after reading this, talk with an experienced masonry contractor in Staten Island before buying materials. A quick consultation could save you from an expensive do-over.
Why Most DIY Paver Patios Fail in Staten Island, NY
Staten Island’s Clay-Heavy Soil and Drainage Issues
Let’s start with something most homeowners don’t think about: what’s underneath your yard.
Staten Island soil is thick with clay in many areas. Clay holds water like a sponge, and when that water has nowhere to go, it pools under your pavers. Within one or two winters, you’ll see sinking, shifting, and uneven surfaces that get worse every year.
Here’s what happens with poor drainage:
- Water pools under pavers instead of draining away
- Clay soil expands when wet, contracts when dry
- Base materials shift and settle unevenly
- Entire sections of your patio sink or tilt
- Problems compound with each rainfall
If your home was built before 1980, you might already be dealing with minor foundation settling. That’s normal for older Staten Island houses. But when you add a heavy paver patio with poor drainage right next to that foundation, you’re asking for trouble. The water that pools under your pavers can make existing settlement issues worse.
The base preparation matters more than the pavers themselves. In Staten Island’s soil conditions, you need proper excavation, the right materials, and correct compaction. Skip any of these, and you’re building on quicksand.
Freeze-Thaw Cycles and Northeast Weather Damage
Staten Island winters are rough. Temperatures swing from below freezing at night to above freezing during the day. Every time this happens, any water trapped in or under your patio expands and contracts.
This is called frost heave, and it’s the number one killer of DIY patio installations. Water seeps into tiny gaps in your base material, freezes overnight, expands, and pushes your pavers up. When it melts, everything settles back down slightly differently than before. Do this a hundred times over one winter, and your perfect patio becomes a wavy mess.
What winter does to improper installations:
- Frost heave lifts pavers unevenly
- Ice expansion cracks individual pavers
- Salt damage breaks down joint sand
- Repeated freezing weakens the base
- Spring reveals a completely shifted surface
Professional installations account for frost depth in this area. They excavate deep enough and use base materials that allow water to drain through instead of pooling and freezing. DIY guides rarely mention frost depth because it varies by location, and they’re written for a national audience.
The “Laid on Dirt” Disaster (Why It Never Lasts)
Here’s where we need to talk about the worst advice floating around the internet: laying pavers directly on dirt.
“Laying on dirt” means exactly what it sounds like. Some guides suggest you can level out the ground, put down landscape fabric, maybe add a thin layer of sand, and start laying pavers. They claim it’s a quick, cheap way to build a patio.
It’s also guaranteed to fail.
Why laying pavers on dirt never works:
- Soil compresses unevenly under weight
- Rainwater erodes the ground underneath
- Weeds push through within weeks
- Pavers sink into soft spots
- No stability or weight distribution
- Entire sections shift with foot traffic
The science is simple. Soil compresses under weight, especially when it gets wet. Pavers are heavy. People walking on pavers create dynamic loads that compress soil even more. Without a stable base of compacted crushed stone, there’s nothing to distribute that weight and prevent sinking.
Typical lifespan of pavers laid on dirt? Six to eighteen months before you’re looking at major problems. Low spots fill with water. High spots become trip hazards. Weeds grow everywhere.
Repairing a patio laid on dirt means ripping everything up and starting over with proper base preparation. You’ll pay for materials twice, plus all the labor to remove the failed installation. Compare that to doing it right the first time with proper paver installation for walkways and patios, and the choice is clear.
If a guide tells you that you can skip the base preparation, close that guide and find a better one.
Understanding the Professional Paver Patio Installation Process
So what separates a patio that lasts twenty years from one that fails in two? The process professionals use versus what DIY guides suggest.
Professional installations follow eight critical steps. Every single one matters. Skip one, and you compromise the entire project. DIY guides often combine steps, rush through the important parts, and spend all their time on the easy stuff like pattern selection.
Let’s walk through what actually needs to happen.
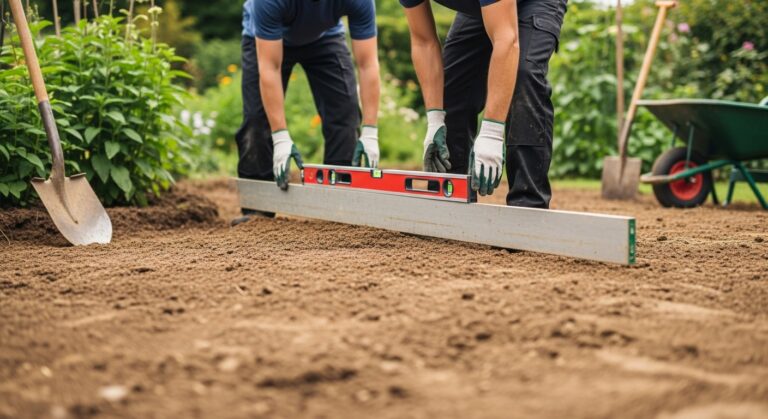
Step 1 – Site Assessment and Planning
Before a single shovel goes in the ground, you need to understand your site.
Critical planning elements:
- Analyze natural water drainage patterns
- Calculate proper slope (1-2% away from the house)
- Locate underground utilities before digging
- Check Staten Island permit requirements
- Measure setbacks from property lines
- Choose a design that matches home’s architecture
Drainage analysis means figuring out how to create a slope away from your house so water runs off instead of pooling. Get this backward, and you’ll have a puddle after every rain.
You also need to plan your layout carefully. Your patio design should complement your home’s architecture, not fight against it.
Step 2 – Excavation to Proper Depth
Most DIY projects fail because they don’t dig deep enough.
Proper excavation requirements:
- Dig 8-12 inches deep (minimum for our climate)
- Account for base material (6-8 inches)
- Account for bedding sand (1 inch)
- Account for paver thickness (2-3 inches)
- Remove all organic material (grass, roots, topsoil)
- Remove any unstable soil that won’t compact
In Staten Island’s climate with our freeze-thaw cycles, this depth isn’t optional—it’s the minimum to get below the frost line’s impact zone.
Measure twice, dig once. If your excavation is uneven, everything built on top will be uneven.
Step 3 – Base Material Selection and Compaction
Here’s where the magic happens, or where DIY projects fall apart.
You need crushed stone, not gravel. Crushed stone has angular edges that lock together when compacted. Rounded gravel shifts and moves. This is a crucial difference that cheap guides ignore.
Base installation done right:
- Use crushed stone (angular, not rounded)
- Install in 2-3 inch layers
- Compact each layer with a plate compactor
- Never use a hand tamper for base compaction
- Test compaction by walking on it
- No footprints should appear in a properly compacted base
This is backbreaking work. It’s also the foundation of everything that follows.
Step 4 – Installing Edge Restraints
Edge restraints keep your pavers from spreading apart over time.
Without them, the pavers at the edges slowly creep outward. Gaps appear. The whole installation starts to fall apart from the outside in.
Edge restraint installation:
- Choose plastic edging for residential use
- Use concrete edging for high-traffic areas
- Anchor with spikes every 12-16 inches
- Install before laying pavers
- Ensures pavers stay locked in place for years
This step takes an hour or two but prevents years of problems.
Step 5 – Bedding Sand Layer Installation
The bedding sand creates a perfectly smooth surface for your pavers to sit on.
Bedding sand requirements:
- Use concrete sand (not play sand or mason sand)
- Screed to exactly 1 inch depth
- Use pipes or rails as leveling guides
- Check the level constantly
- Precision matters.”about an inch” isn’t good enough
This precision separates pro work from amateur attempts.
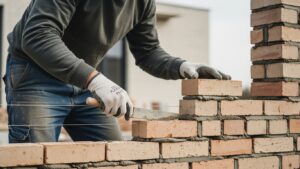
Step 6 – Paver Laying and Pattern Execution
Finally, the fun part that all the DIY guides focus on.
Proper paver installation technique:
- Start from a straight edge (house or primary sightline)
- Work across, maintaininga consistent pattern
- Use a wet saw with a diamond blade for cuts
- Maintain 1/8 inch spacing between pavers
- Never walk on bedding sand
- Check the level as you go
When you’re working on how to install patio pavers or figuring out how to make a paver patio, remember that this step only works if the five steps before it were done correctly.
Step 7 – Compacting and Joint Sand Installation
Once all pavers are laid, you compact them into the bedding sand with the plate compactor.
Final compaction and sand process:
- Run a plate compactor over the entire surface
- Make multiple passes in different directions
- Use polymeric sand (not regular sand)
- Sweep sand into all joints until full
- Mist with water to activate polymeric sand
- Allow proper curing time before use
Regular sand would wash away in a few months. Polymeric sand hardens and resists washout, weed growth, and ant colonies.
Step 8 – Sealing and Final Protection
Not all pavers need sealing, but many benefit from it.
Sealing guidelines:
- Choose breathable sealer for Staten Island weather
- Wait 30-60 days after installation before sealing
- Protects against stains and salt damage
- Enhances paver color
- Reseal every 2-4 years
- Budget for ongoing maintenance
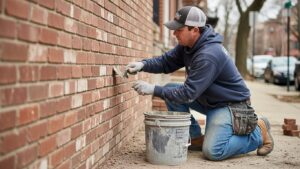
If you’re considering brick and paver projects, the same principles apply. Quality installation determines longevity.
Tools and Materials: What You Actually Need (And What It Costs)
Let’s talk about what this project actually requires in terms of equipment.
Major tools needed:
- Plate compactor (rent: $80-120/day)
- Wet saw with diamond blade (rent: $60-90/day)
- Builder’s level or laser level ($30-300)
- Hand tamper for edges ($30-50)
- Wheelbarrow ($60-100)
- Shovels and rakes ($50 total)
- Mason’s string and stakes ($20)
- Tape measure ($15-30)
Safety equipment required:
- Work gloves
- Safety glasses
- Ear protection
- Dust masks
- Knee pads
- Steel-toe boots
Materials list:
- Crushed stone base (2-3 tons for 200 sq ft)
- Bedding sand (concrete sand)
- Pavers (plus 10-15% extra for cuts/waste)
- Edge restraints
- Polymeric sand
- Landscape fabric (optional)
For a modest 12×16 foot patio (192 square feet), expect to invest $800-1,500 in materials and $200-400 in tool rentals, assuming you already own basic tools.
Hidden costs DIYers forget:
- Delivery fees ($50-150)
- Waste factor (buy 10-15% extra)
- Dump fees for excavated material ($30-100)
- Extra rental days when the project runs long
- Replacement materials for mistakes
- Urgent care visit for injuries (seriously)
That’s if everything goes perfectly. And that’s a big “if.”
The Real Cost Analysis: DIY vs. Professional Installation
Cost Comparison Table
Factor | DIY Costs | Professional Costs |
Materials | $800-1,500 | Included in price |
Tools/Equipment | $200-400 (rental) | Included in price |
Time Investment | 40-80 hours | 2-3 days (your time: 0) |
Skill Level Required | Advanced (steep learning curve) | Not applicable |
Warranty/Guarantee | None | 1-5 years typical |
Longevity Expected | 3-5 years (if done well) | 20+ years |
Repair Likelihood (5 years) | 60-80% | 5-10% |
Total Cost of Ownership | $1,500-4,000+ (with likely repairs) | $3,500-7,000 (one time) |
Hidden Costs of DIY Paver Patios
That time investment deserves a closer look. Forty to eighty hours means multiple full weekends, assuming decent weather and no major complications.
Real costs beyond materials:
- 40-80 hours of your time ($1,000-2,000 opportunity cost)
- Physical labor risks (back injuries, knee problems)
- Material waste from mistakes (15-25% typical)
- Future repairs when installation fails
- Reduced property value from poor workmanship
- Cost to hire a pro to fix the failed DIY attempt
One trip to urgent care wipes out any savings. When your DIY patio starts failing after two or three years, you’re looking at either fixing it yourself again or paying a professional to repair it. Repairs often cost more than installation because the failed materials need to be removed first.
What You Get with Professional Installation
Professionals pull permits and carry proper insurance. If something goes wrong, you’re protected.
Professional installation benefits:
- Proper permits and inspections
- Full insurance coverage
- Warranty on labor and materials (1-5 years)
- Correct drainage and grading
- 20+ year lifespan with basic maintenance
- No time investment from you
- Peace of mind
The value proposition isn’t about being lazy or incapable. It’s about investing your money where it provides the best return. For most homeowners, that means professional paver patio installation in Staten Island.
When DIY Makes Sense (And When It Doesn’t)
DIY can work for small, low-traffic projects in ideal conditions.
Good candidates for DIY:
- Small walkways (6×8 feet or less)
- Level ground with good drainage
- Low-traffic sitting areas
- Simple patterns
- You have intermediate-advanced DIY skills
- You’ve used similar tools before
Never attempt DIY for:
- Patios larger than 150 square feet
- Areas with poor drainage
- Sloped yards needing extensive grading
- Installations near home foundations
- Projects requiring permits
- Clay soil without proper knowledge
Questions to ask yourself:
- Do I have 60-80 hours for this project?
- Can I lift and move several tons of material?
- Do I have access to all necessary tools?
- Can I afford professional repair if I mess up?
- Am I comfortable possibly redoing this next year?
If you answered no to any of these, strongly consider hiring a professional. There’s no shame in knowing your limits. That’s actually wisdom.
How to Choose a Masonry Contractor in Staten Island
Looking for a pro? Here’s what to check.
Essential contractor requirements:
- Valid New York licensing
- Current liability insurance
- Workers’ compensation coverage
- Local Staten Island experience
- Verifiable references
- Written warranties
Questions to ask during estimates:
- How long have you worked in Staten Island specifically?
- Can you provide local references from recent projects?
- What’s your warranty on labor and materials?
- How do you handle drainage in clay soil?
- What’s your timeline, start to finish?
- Do you pull necessary permits?
Red flags to watch for:
- Pressure to decide immediately
- Estimates that seem too good to be true
- Requests for full payment upfront
- No local references available
- Suggests shortcuts to “save money.”
- Can’t provide proof of insurance
Check their portfolio. Look at photos of completed projects. Better yet, ask if you can see a project in person or talk to a past client.
Why local experience matters: someone who’s worked in Staten Island for years understands our soil, our weather, and our building codes. They have relationships with local suppliers and know which materials hold up best here.
Working with a full-service masonry contractor means they can handle any related work your property needs, from patio installation to walkway repairs to chimney work.
Choose a trusted Staten Island masonry contractor who treats your home like their own.
Maintaining Your Paver Patio for Staten Island Weather
Even the best installation needs maintenance.
Seasonal maintenance schedule:
Spring:
- Sweep off winter debris
- Check for shifted pavers
- Replenish joint sand as needed
- Inspect drainage
Summer:
- Clean stains promptly
- Monitor for weeds or ants
- Wash with water and stiff broom
- Check for loose edge restraints
Fall:
- Thorough cleaning before leaves fall
- Verify drainage before winter
- Apply fresh sealer if needed
- Inspect for any settling
Winter:
- Use calcium chloride (not rock salt)
- Avoid metal shovels that chip pavers
- Clear snow promptly
- Watch for ice buildup from poor drainage
When to call for professional repairs:
- Significant settling (more than 1/2 inch)
- Multiple cracked pavers
- Edge restraints are coming loose
- Standing water after rain
- Large sections shifting
Typical maintenance costs over ten years: $500-1,000 if you do it yourself, $1,500-2,500 if you hire professionals for annual maintenance. Compare that to replacement costs of $5,000-10,000 for a failed patio.
Conclusion – Making the Right Choice for Your Staten Island Home
Can you build a paver patio yourself? Yes. Will it perform as well or last as long as a professional installation? Probably not.
DIY is possible, but it carries real risks. The learning curve is steep. The physical work is demanding. The margin for error is slim. And the consequences of mistakes are expensive.
Staten Island-specific challenges:
- Clay soil doesn’t forgive shortcuts
- Freeze-thaw cycles destroy improper work
- Older homes need extra drainage attention
- Local weather demands proper installation
Think of your patio as a long-term investment in your home and your quality of life. You’ll use this space for years, for family barbecues, quiet morning coffee, and evening relaxation. Do you want to spend those years enjoying your patio or repairing it?
Quality costs more upfront but saves money over time. A professional installation that lasts twenty years costs less per year than a DIY project that needs major repairs every three years.
The choice is yours. Go DIY if you have the skills, time, and willingness to accept the risks. Or invest in professional installation and enjoy peace of mind.
Ready to talk about your project? Whether you’re looking for advice on DIY or want to discuss professional installation, we’re here to help. Schedule your paver patio consultation, and let’s figure out the best solution for your Staten Island home. No pressure, no obligation, just honest guidance from local experts who’ve been doing this for years.
Your backyard deserves better than a quick fix. Let’s build something that lasts.
Our Service
How to Build a Paver Patio
How to Build a Paver Patio (What Most DIY Guides Don’t Tell You) Building a paver patio yourself is possible, but most DIY guides leave out the mistakes that end up costing homeowners thousands to fix later. If you’re thinking
Why Do Contractors Pronounce Masonry as Masonary?
Why Do Contractors Pronounce Masonry as Masonary? You’ve probably heard it before, a contractor says “masonary” instead of “masonry,” and you wonder if you’ve been saying it wrong your whole life. Here’s the truth: the correct pronunciation is “MAY-sun-ree,” not
Masonry Labor Costs Explained: Why Skilled Masons Charge More
Why Labor Is the Biggest Cost in Masonry Skilled masons charge more because their work requires years of training, precision, and expertise that prevents costly structural failures. Many homeowners feel surprised when they receive quotes for masonry projects and realize
Why Is Masonry Work So Expensive?
A real-world breakdown of what you’re actually paying for Introduction: The Price Shock Most Homeowners Don’t Expect You get the estimate back and your jaw drops—how can bricks and mortar possibly cost that much? Most homeowners expect masonry to be